In today’s digital age, understanding your website’s performance is crucial for success. Google Analytics 4 (GA4) is a powerful tool that provides valuable insights into your website’s traffic and user behavior. In this guide, I’ll walk you through the process of setting up Google Analytics 4 for your WordPress website, step by step.
Table of Contents
| Sr# | Headings |
|---|---|
| 1. | Introduction |
| 2. | Why Google Analytics 4 is Important |
| 3. | Setting Up Google Analytics 4 |
| 4. | Installing GA4 on Your WordPress Site |
| 5. | Configuring GA4 for WordPress |
| 6. | Understanding GA4 Reports |
| 7. | Best Practices for Using GA4 |
| 8. | Common GA4 Mistakes to Avoid |
| 9. | Conclusion |
| 10. | FAQs |
1. Introduction
Google Analytics 4 is the latest version of Google’s analytics platform, offering new and improved features to help you better understand your website’s performance. In this guide, we’ll show you how to set up Google Analytics 4 for your WordPress website, step by step.
2. Why Google Analytics 4 is Important
Google Analytics 4 provides valuable insights into your website’s traffic and user behavior, allowing you to make informed decisions about your website’s content and marketing strategies. It offers a more streamlined and user-friendly interface compared to its predecessor, Universal Analytics.
3. Setting Up Google Analytics 4
To set up Google Analytics 4 for your WordPress website, follow these steps: ?
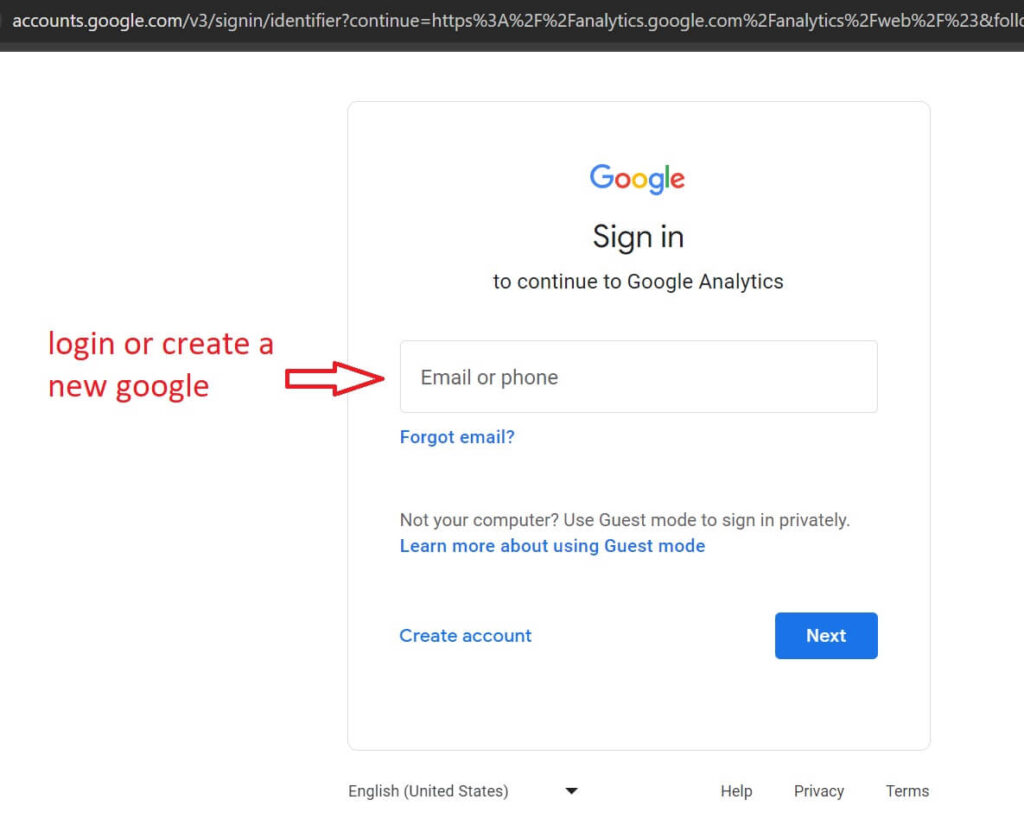
Step 1: Sign in to Google Analytics
First, sign in to your Google Analytics account (analytics.google.com) or create a new one if you don’t have one already.
Step 2: Create a new Google Analytics 4 property
In your Google Analytics account, click on “Admin” in the bottom left corner, then click on “Create Property” and select “Web.”
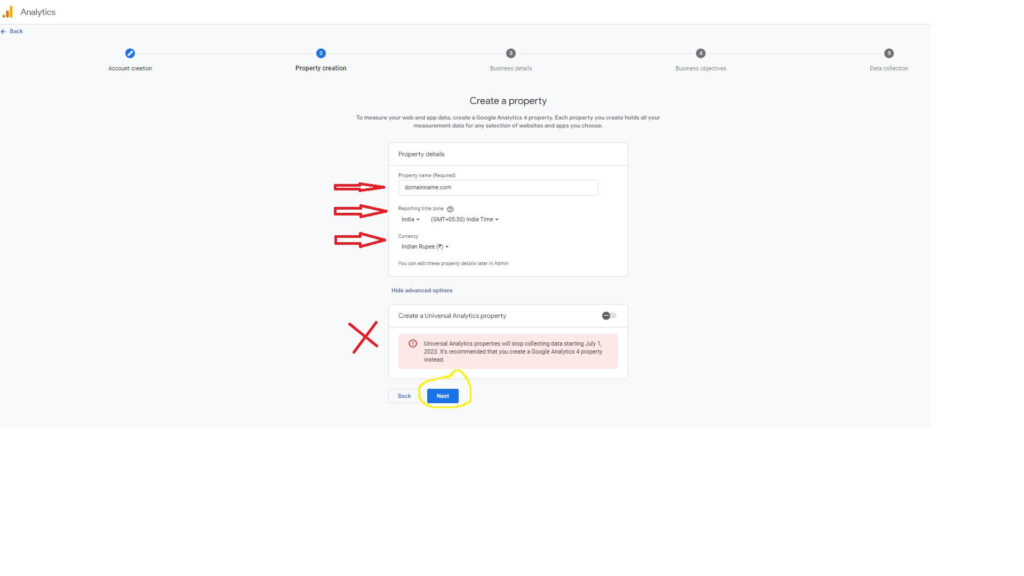
Step 3: Enter your website details
Enter your website’s name, URL, and select your industry category and reporting time zone.
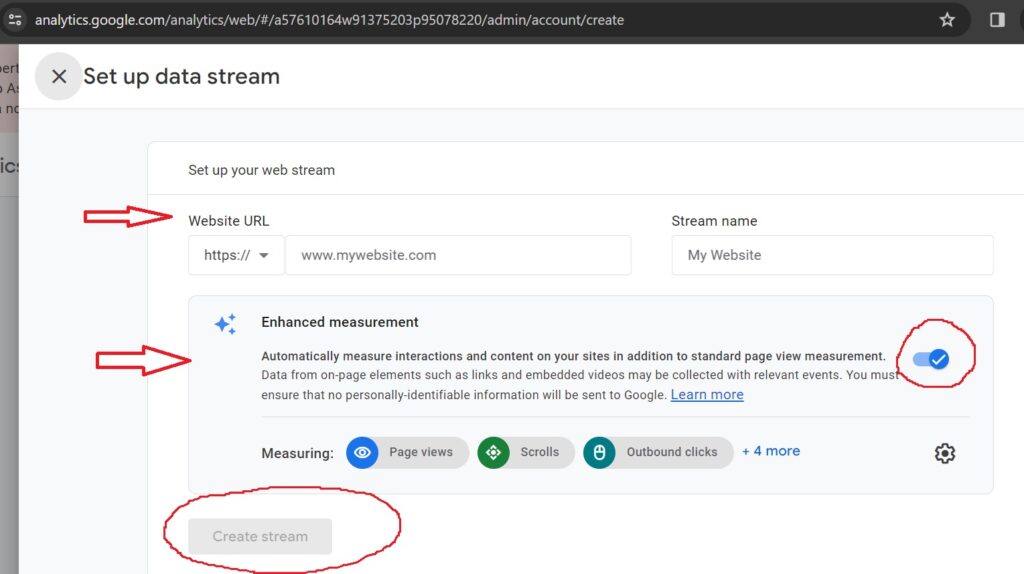
Step 4: Configure your data stream
Follow the on-screen instructions to configure your data stream. You’ll need to add the tracking code to your WordPress website.
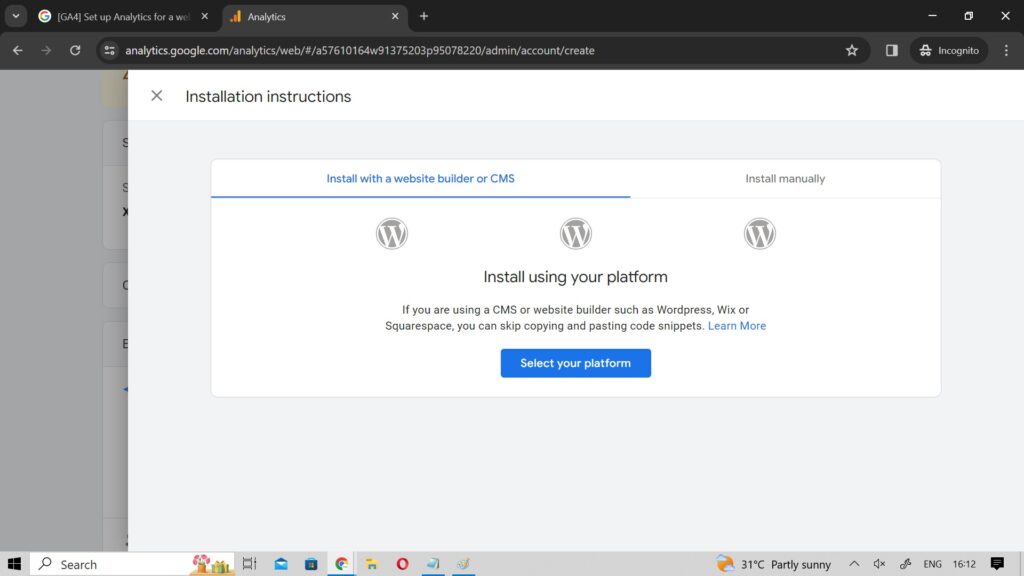
Step 5: Install the tracking code on your WordPress website
Copy the tracking code provided by Google Analytics and paste it into the header section of your WordPress website. You can do this by editing your theme’s header.php file. Or you can use Site kit plugin to link to GA4 to your website.
Step 6: Verify installation
Once you’ve installed the tracking code, return to Google Analytics and click on “Verify installation” to ensure everything is set up correctly.
4. Installing GA4 on Your WordPress Site
Installing Google Analytics 4 on your WordPress site is crucial for tracking your website’s performance. Here’s how you can do it:
Step 1: Install the Google Analytics for WordPress plugin
Go to your WordPress dashboard, navigate to “Plugins” > “Add New,” and search for “Tacking code manager”. Install and activate the plugin.
Step 2: Connect your Google Analytics account
In your WordPress dashboard, go to “Settings” and click on the “Tracking code manager” button. Follow the on-screen instructions to connect your Google Analytics account.
Step 3: Configure the plugin settings
Once you’ve connected your Google Analytics account, configure the plugin settings according to your preferences. Add the tracking code inside the black box.
Step 4: Verify installation
After configuring the plugin settings, verify that Google Analytics is tracking your website’s data correctly by visiting your website and checking the real-time analytics in your Google Analytics account.
5. Configuring GA4 for WordPress
Configuring Google Analytics 4 for your WordPress website involves setting up goals, events, and custom dimensions to track specific user interactions. Here’s how you can do it:
Step 1: Set up goals
Goals in Google Analytics 4 allow you to track specific user interactions, such as form submissions or product purchases. To set up goals, go to “Admin” > “Goals” and click on “New Goal.”
Step 2: Set up events
Events in Google Analytics 4 track specific user interactions, such as button clicks or video views. To set up events, go to “Admin” > “Events” and click on “Create Event.”
Step 3: Set up custom dimensions
Custom dimensions in Google Analytics 4 allow you to track additional information about your users, such as their location or device type. To set up custom dimensions, go to “Admin” > “Custom Definitions” > “Custom Dimensions” and click on “Create Custom Dimension.”
6. Understanding GA4 Reports
Google Analytics 4 offers a wide range of reports to help you understand your website’s performance. Some of the key reports include:
- Real-time reports: Provides real-time data on your website’s traffic and user behavior.
- Audience reports: Provides insights into your website’s audience, such as their demographics and interests.
- Acquisition reports: Provides insights into how users are finding your website, such as through search engines or social media.
- Behavior reports: Provides insights into how users are interacting with your website, such as the pages they visit and the actions they take.
7. Best Practices for Using GA4
To get the most out of Google Analytics 4, consider the following best practices:
- Regularly review your reports to identify trends and opportunities for improvement.
- Set up custom alerts to notify you of any significant changes in your website’s performance.
- Use annotations to mark important events, such as website updates or marketing campaigns, in your reports.
8. Common GA4 Mistakes to Avoid
When setting up and using Google Analytics 4, avoid the following common mistakes:
- Not setting up goals or events to track specific user interactions.
- Not regularly reviewing your reports to identify areas for improvement.
- Not using custom dimensions to track additional information about your users.
9. Conclusion
Setting up Google Analytics 4 for your WordPress website is essential for understanding your website’s performance and making informed decisions about your content and marketing strategies. By following the steps outlined in this guide, you can set up Google Analytics 4 for your WordPress website and start tracking your website’s performance today.
10. FAQs
Q1: How do I track conversions in Google Analytics 4?
A1: To track conversions in Google Analytics 4, you need to set up goals or events to track specific user interactions, such as form submissions or product purchases.
Q2: Can I use Google Analytics 4 with other analytics tools?
A2: Yes, you can use Google Analytics 4 with other analytics tools, but keep in mind that each tool may have its own tracking code and configuration settings.
Q3: How often should I review my Google Analytics 4 reports?
A3: It’s a good idea to review your Google Analytics 4 reports regularly, such as weekly or monthly, to identify trends and opportunities for improvement.
Q4: Can I use Google Analytics 4 to track mobile app performance?
A4: Yes, Google Analytics 4 offers enhanced reporting capabilities for tracking mobile app performance, including user engagement and retention metrics.
Q5: Is Google Analytics 4 free to use?
A5: Yes, Google Analytics 4 is free to use, but keep in mind that there are limitations on the amount of data you can track with the free version.